


Taking Skyrizi Biologics Dose With Me: A Step-by-Step Guide to the On-Body Injector!
- Stoma Warrior
- Feb 12
- 3 min read

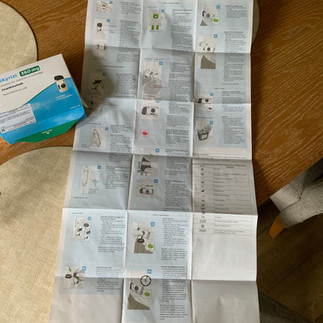
Today, I wanted to record and share the process of using my Skyrizi on-body injector with you. The official instructions are one HUGE page, so I thought a live walk-through of what it really takes to administer this drug yourself would be helpful.
Please watch the live video here or read on!
Step 1: Preparation is Key
The very first thing you need to do is get your Skyrizi out of the fridge. It needs to stay in its original box—which has a special film texture to protect it from light—until you are ready to use it. I took mine out exactly one hour ago (recommended time, no longer, to reach room temperature) to let it reach room temperature.
I get my on-body injector supplied by Sciensus on free prescription via my hospital consultant here in the UK. Along with the device and the medication, you’ll need a small alcohol swab.


Step 2: Prepping Your Body (The MCAS Routine)
Because I have Mast Cell Activation Syndrome (MCAS), my histamines can overproduce and attack themselves. Taking Skyrizi can make me quite allergic for the day of the dose and a few days after (been up to 5 days), so I’ve already taken Piriton and sodium cromoglicate (prescribed) to prepare.
I’m also choosing to use my stomach for the injection site today. The last time I used my leg, I had a nasty allergic reaction—a big, itchy welt that wrapped around my leg for three days. I find the stomach much more comfortable; because there's more "fatty bit" and less muscle, it doesn’t have that sharp sting I sometimes felt in my leg.
Step 3: Loading the Injector
First, I use an alcohol swab to wipe the site on my belly and the smaller end of the medication vial.
1. Insert the vial: Pop the vial into the device with the small tip first.
2. Listen for the clicks: Push it down until you hear a click, then shut the door until you hear a second click.
3. Check the window: You should see the clear liquid through the window. If you put it in the wrong way, the window will be black, and you won't be able to monitor the medication.
Step 4: Activation and Application
Once the vial is in, peel off the sticky backing. You’ll hear little beeps, which means the device is activated. You will see a blue flashing light, indicating it is ready.
I place the device on my stomach, about 5cm from my belly button, and give it a firm press. Then, I just press the button. You’ll hear a click, and the green light will start flashing—that means the injector is working!
Step 5: The Five-Minute Wait
The process takes about five minutes. You might hear a slight mechanical noise and feel a tingling sensation as the liquid is pushed through, but for me, there is no pain.
Step 6: Post-Injection Care and Disposal
When the five minutes are up, I peel the device off and give the area a quick wipe with a tissue. The entire device goes straight into my sharps bin.
To manage my skin’s reaction to a "foreign body," I’ll take another dose of Piriton in a few hours and apply some hydrocortisone cream locally to prevent hives and itching.
And that’s it! It helps me immensely, and once you get the routine down, it's over before you know it. Thanks for joining me for this dose!.
As always this is written by me from my experience, I am not medically trained ( well I was taught by the IBD specialist Nurses to do this) so please check with your medical professionals if you need advice :)
Take care!
Andrea xx


Comments